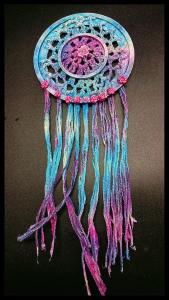
Designed by Donna Mcghie

The story behind my Powertex dreamcatcher. I will always have a bit of a soft spot for dream catchers. When my daughter was young she suffered awfully from night terrors.
We tried many techniques to get her to have a peaceful night, and spoke to many professionals as well. One of the things we tried, hoping that it would help her even if just a through a placebo effect was a dream catcher.
I’d be lying if I said she slept perfectly once we hung up her dream catcher. The thought of it catching those bad dreams and holding them at bay definitely had a calming effect on her before she closed her eyes at bedtime to go to sleep.
Thankfully those days are long behind us now, and my daughter is now a young woman. But she has seen the dream catcher shown here and I know this is something she would still hang up in her bedroom or living room.
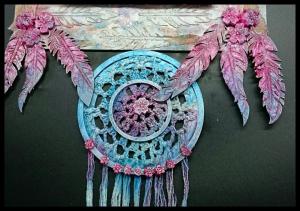
For this dream catcher I used the gorgeous ink sprays now available from Powertex UK. I just love how vibrant and easy to use these are, and how they automatically blend into each other to create almost an air brushed effect.
Materials List
- MDF Dream Catchers with Feathers Pop Out Pieces
- Paperdecoration Light Pink
- Paperdecoration Natural
- Ivory Fabric Hardener
- Transparent Fabric Hardener
- Stone Art
- Powercolor Titanium White Pigment
- Interference Blue Powder Pigment
- Interference Red Powder Pigment
- Metallic Acrylic Ink Silver
- Acrylic Ink Aqua Spray
- Acrylic Ink Rasberry Spray
- Rasberry Sorbet Arcylic Paint
- Powertex Easy Varnish
- Powertex Easy Structure
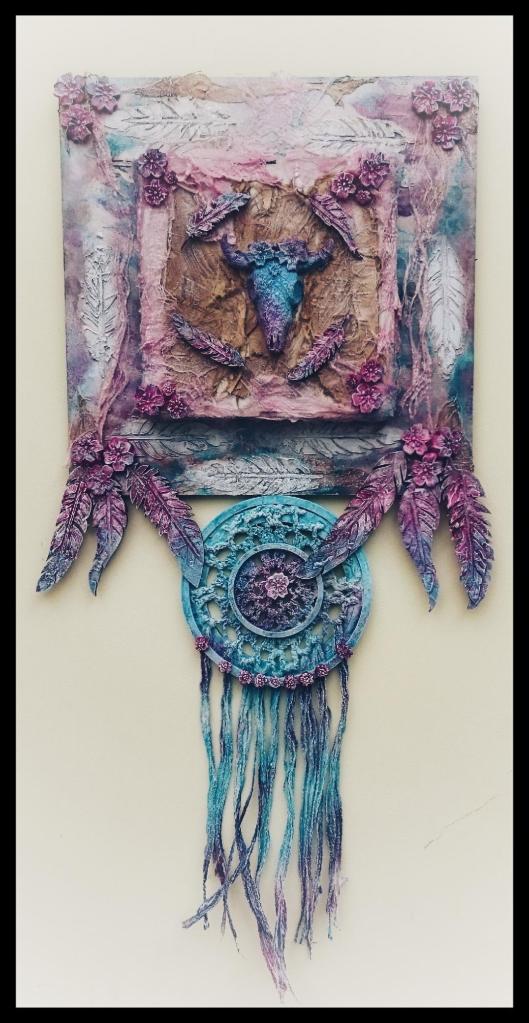
- Cow Skull and Flowers Mould Set
- Powertex MDF Frame and Panel
- That’s Crafty Dinky Stencil Feather
- Ready Mixed Mahogany Bister Liquid
- Small Piece of Crochet from a charity shop (a doily would work just as well)
- String
How to make my Powertex dreamcatcher
Prepare the frame
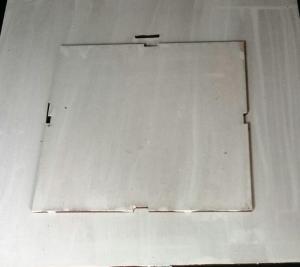
Paint the Powertex mdf frame and panel with Ivory Fabric Hardener and set aside to dry.
Mix up Stone Art clay
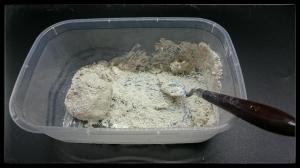
Mix up Stone Art with Ivory Fabric Hardener to form a clay. I pressed this into the Cow Skull and Flowers mould.
Spray with acrylic inks
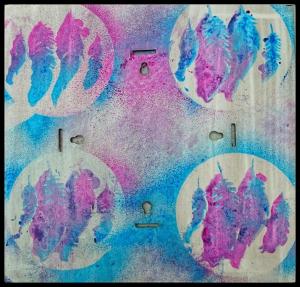
I wanted to create a surreal dreamy effect, so popped out the shapes from the MDF Dream Catchers and used them as stencils, spraying over with my ink sprays randomly.
Add Easy Structure texture
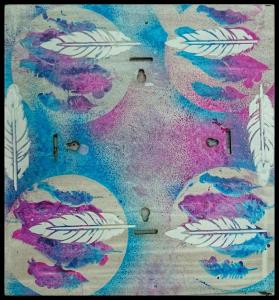
Put Easy Structure onto a pallet knife and smear it through a leaf stencil. I also sponged silver acrylic onto the leaves.
Use Bister spray for depth
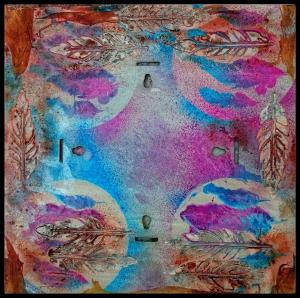
I added more texture by soaking my natural paperdecoration in transparent hardener and placing around the edges. I also sprayed the edges with Mahogany Bister Spray.
Lay out Paperdecoration
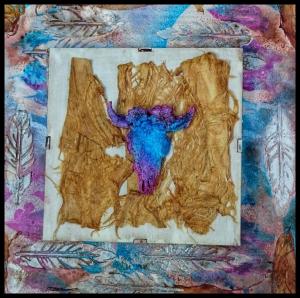
Put together the inner section and add paperdecoration (soaked in transparent hardener) and the cow’s head. I did not glue it in just yet.

I soaked my light pink paperdecoration in transparent fabric hardener and add this to my design also.
Mdf feathers

My next step was to add texture to my mdf feathers by using the Easy Structure and my feather stencil. I put them to one side to dry.
Paint and add clay flowers
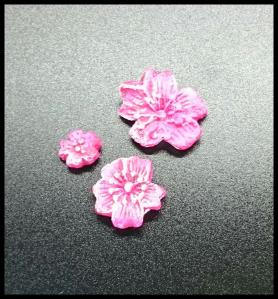
Painted all the small flowers with Acrylic Paint and once dry, dry brush with White Powercolor.
Add crochet fabric
I soaked some crochet in the Ivory Hardener and secured it into the mdf circles. Once dry, I sprayed with my inks and added flowers
Glue the pieces together
Glue the dream catcher into place and add feathers to the design.
Dry brushing
Finally I dry brushed my whole piece using the interference pigments and the white Powercolor.
Finishing Touches
The interference colours were gorgeous to use with this project, as I honestly do think they have a dreamy quality to them. I also used a sponge to add just a touch of the aqua ink to the tips of the feathers. I felt they needed something extra to help them blend in.
TOP TIP: I was slightly concerned about the dream catcher adhering to the square, but found by putting glue on both the top of the dream catcher, and also the larger feathers it secured on nicely.
That’s all from me for this month. If you’ve enjoyed this Powertex dreamcatcher, I would be really grateful if you popped over to check out my Facebook page as well. You can also see my last design team project that’s great for Halloween.
Until next time, keep powertexing 🙂

Beautiful live the colours
LikeLike
Thanks Patricia, I love the colours too, so bright 🙂
LikeLike
Thanks Patricia 🙂
LikeLike
This is so beautiful Donna
LikeLike
Thank you 🙂
LikeLike